Section 6: Configuring the VM
Introduction
While the initial setup guides us through the basic process of building our virtual machine, there are a couple of additional adjustments we need to make to ensure it’s configured correctly for our project. Specifically, we need to adjust the number of CPU cores allocated to the VM and mount the ISO file that will install our operating system. These steps are crucial to optimizing performance and preparing the environment for the tasks ahead. Let's dive into these configurations to get our VM fully ready for use.
Why Do We need This?
Configuring the VM with 4 processors and 4096 MB of memory is a critical step to ensure the LOGG stack performs optimally. In data processing tasks like these, having more CPU cores or threads is often more important than raw processor speed. This is because the stack’s components, particularly OpenSearch and Logstash, are designed to handle large volumes of data by parallelizing tasks across multiple cores.
OpenSearch and Logstash are both built on Java, which manages memory through the Java Virtual Machine (JVM). JVM-based applications benefit from multiple cores as they can distribute processing loads across threads, improving performance and responsiveness. However, they also require sufficient memory to manage data efficiently. OpenSearch uses memory to store index data and query results, while Logstash needs memory to buffer and process logs in real-time. With only 4 cores, your system will be able to manage basic tasks, but as data loads increase, these resources may become a bottleneck. Understanding this allows you to anticipate the system’s behavior and plan for potential upgrades as your data processing needs grow.
And then there's Linux—the trusty OS that’s about to become the backbone of our entire operation. Remember that big ISO we downloaded earlier? Yep, it’s finally time to put it to work. Linux is like the dependable engine under the hood; it quietly powers everything we do, from managing resources to keeping our stack running smoothly. Without it, our processors and memory would be sitting idle, and our entire setup would be more of a concept than a functioning system. So yes, we definitely need it, and it’s about to earn its keep.
Lets Get Started
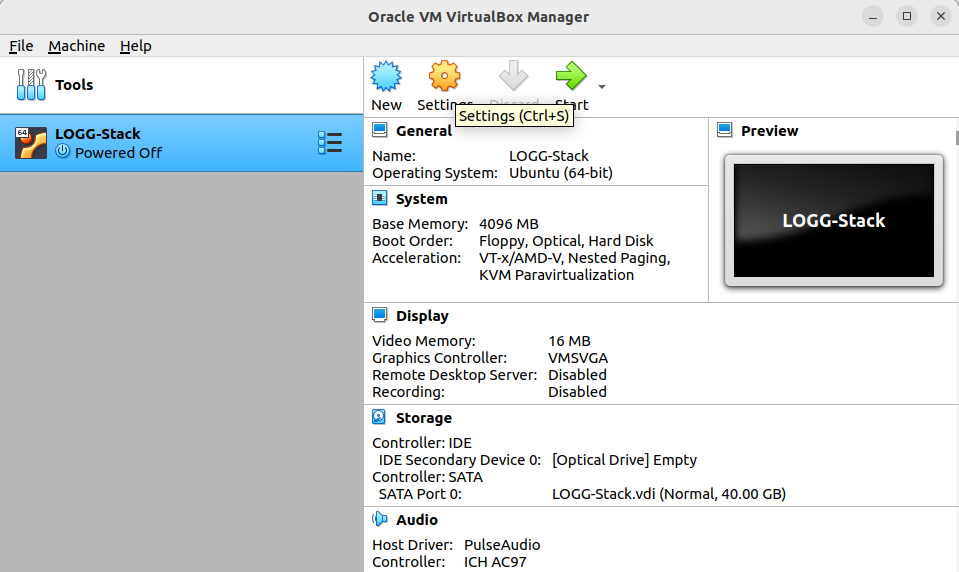
Clicking Settings will bring up the screen below.

The adjustments we need to make can be found under the System icon in the VirtualBox settings. Specifically, we'll focus on the Processor tab, where we can configure the number of CPU cores allocated to our virtual machine. The following section will guide you through these steps, as illustrated below.
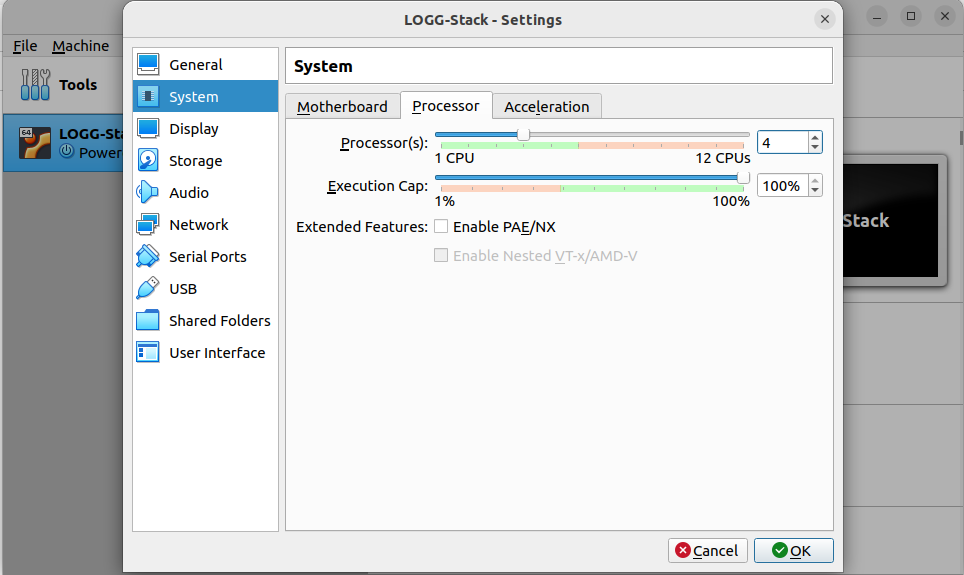
Adjust the number of CPU cores by either typing the value directly or using the slider. For this project, we're aiming to allocate 4 processor cores to ensure optimal performance. If your system has fewer cores available, you can reduce this to 2 cores, but 4 cores will provide the best results for our needs.
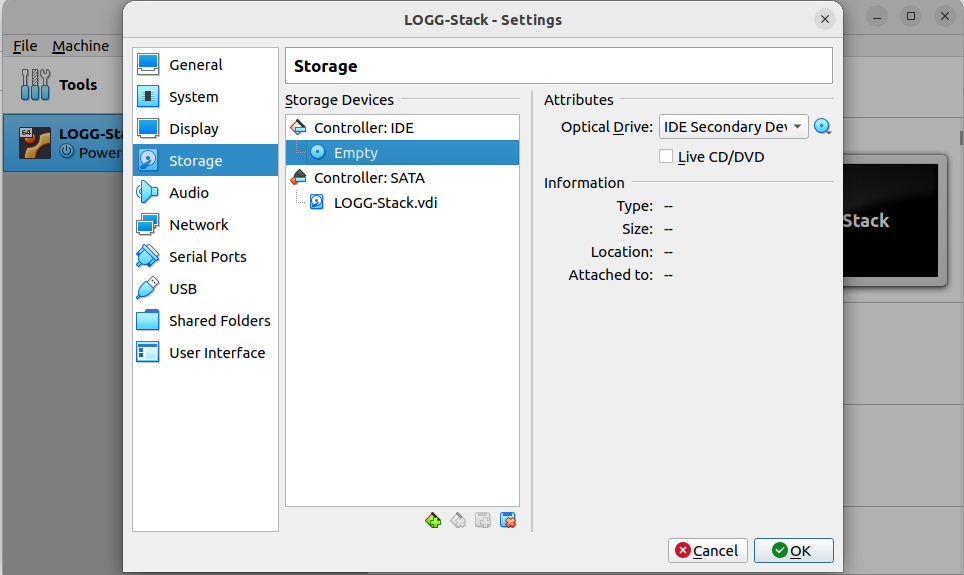
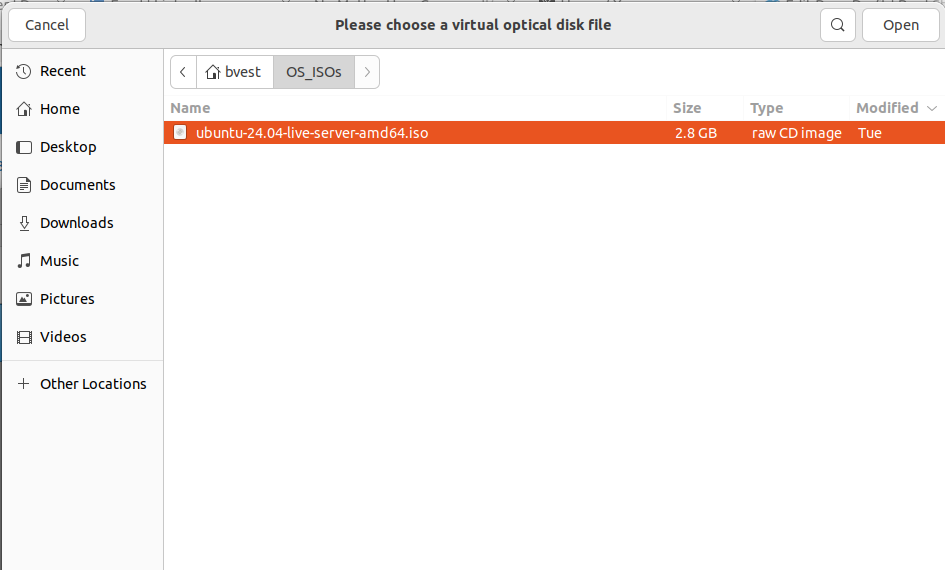
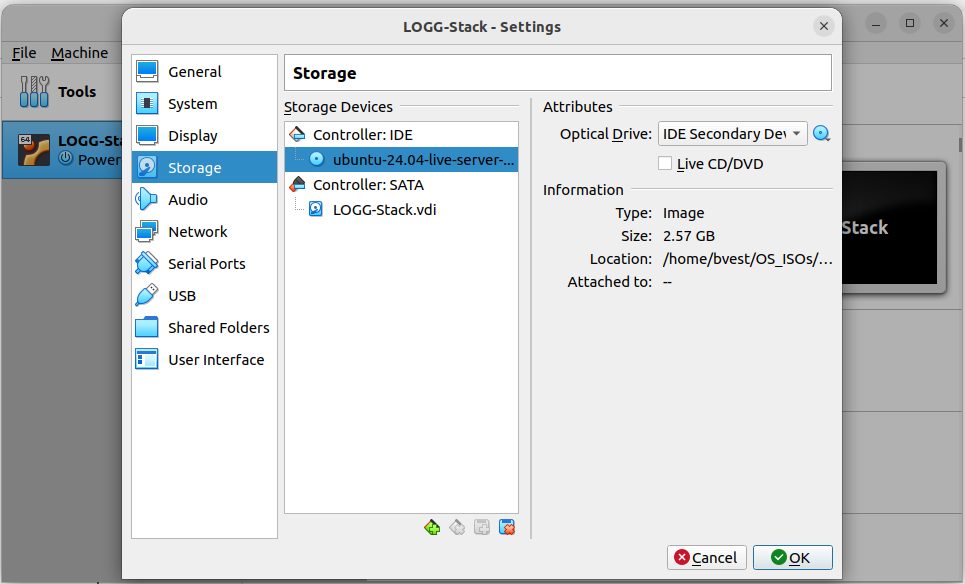
Once you're in the Storage settings, select the Empty disk option under Controller: IDE. This represents the virtual DVD drive for our VM, where we'll mount the Ubuntu ISO. Click on the small blue disk icon next to IDE Secondary Device and choose "Choose a Disk File" from the dropdown menu. This action will open a file selection window. While the appearance of this window may vary depending on your operating system, simply locate and select the Ubuntu ISO file that we downloaded earlier.
After loading the file you will be returned to the setting screen shown below.
From here click OK and you will be returned back to the main virtualbox screen. You can verify your changes here in the window on the right.
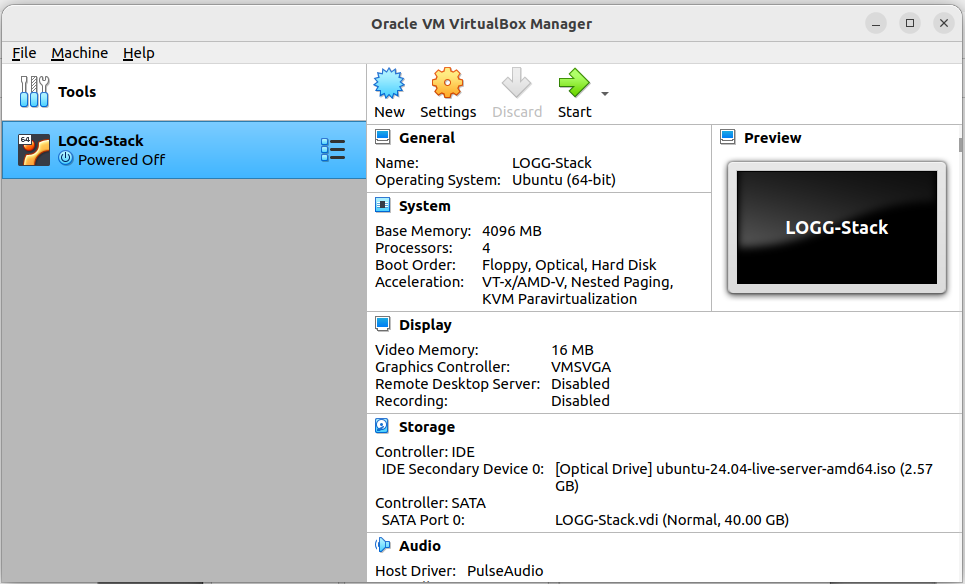
At this point, you should see that the VM is configured with 4 processors, 4096 MB of Base Memory, and that the IDE Secondary Device 0 is now set to our Linux ISO. With these configurations in place, we're ready to start the VM and begin the installation of our operating system. Follow along in Chapter 3: Installing Linux, where we will walk through the installation process step by step and explain the various options available.
No Comments